
Holiday Crafts: On a Budget
As the Holiday season arrives and the days grow cozier, it’s the perfect time to gather as a family and create something special together. In this blog, we’re sharing budget-friendly craft activities that are fun for all ages. Whether you’re looking to decorate your home, make heartfelt gifts, or just enjoy a creative afternoon, these projects are easy to follow and require just a few materials. Read on for step-by-step instructions to bring these festive crafts to life!
Yarn Ornaments
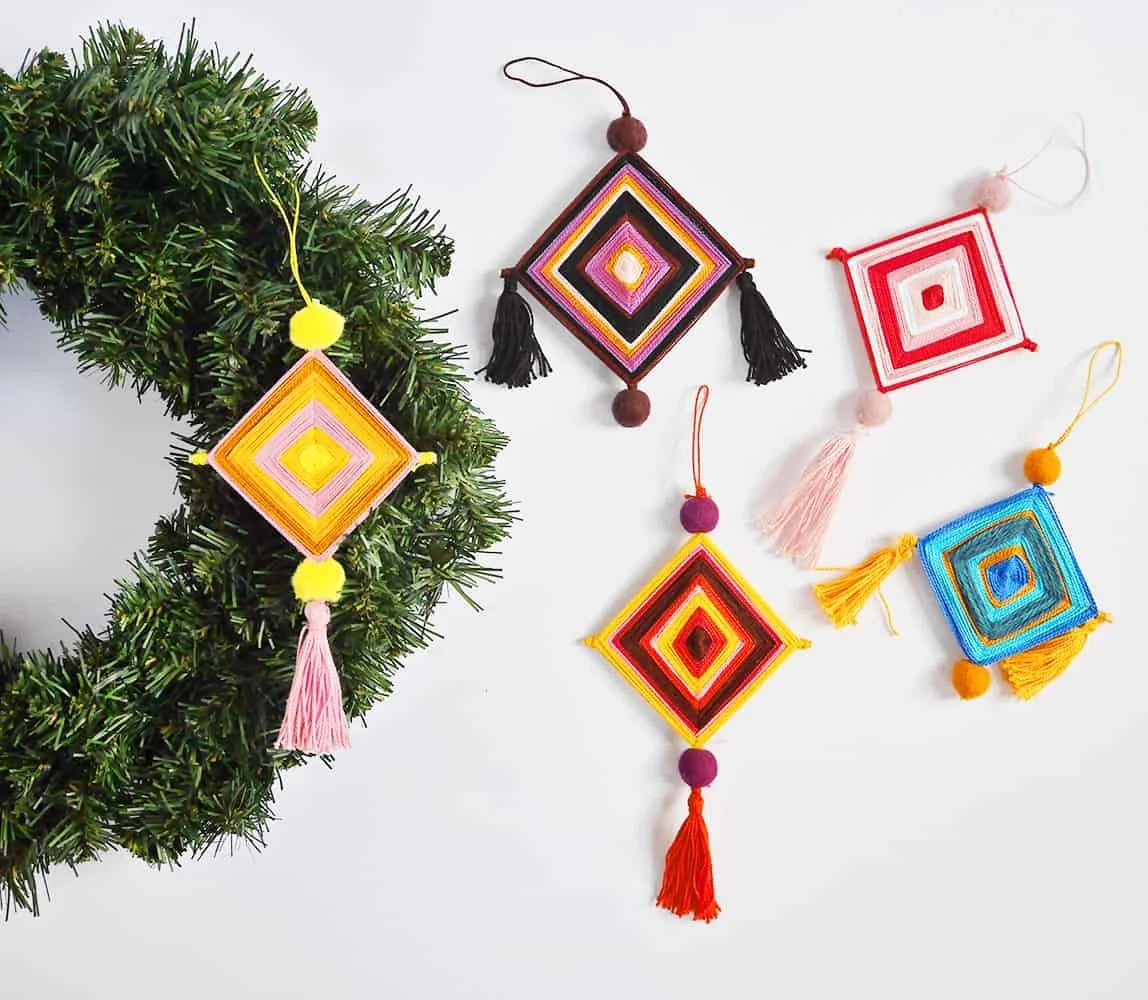
Often called “ojo de dios” (god’s eyes) or “tsikuri”, this decoration originates with the Indigenous people of Sierra Madre. They are made by winding wool in a simple pattern around crossed sticks. It’s both meditative and relaxing, and great for hands that need to be kept busy. And they make great ornaments!
What you Need
Sticks - use popsicle sticks, dowels, chopsticks or even twigs from the garden
Yarn in at least two colours
Scissors
Optional: pom-poms, feathers, ribbon, tassels or other decorative items

Cut two sticks so that they are roughly the same length. About 15cm is a good length for a small ornament. Place the sticks so that they cross at right angles at the middle point of both sticks.
Leaving a tail of a few centimetres, start wrapping your wool to form an ‘X’. Make sure to pull the wool tight so that the sticks don’t move once they are secured.
Once the centre is secure, you can start weaving the god’s eye pattern. To do this, pass the wool over the top of one stick, and loop under and around it, back to where you started. Take the wool over to the next stick and repeat, making sure to go over the stick and then under when you make your loop, as before. You will need to keep the tension of the wool tight.
If and when you want to change colour, cut your wool so you have a tail of about 3cm. Either tie on or (leaving a tail) position a new thread, and carry on with the same pattern as before.
You can trim off these tails later.
Continue until the ornament is the size you want, then tie off the wool on one of the sticks.
Optional: add decorative tassels, feathers, leaves or pompoms to the ends of your stick.
Download printable resource for yarn ornaments
Air Dry Clay Ornaments
Air dry clay is a great material that allows you and your kids to get creative with clay without making a big mess or having to use the oven. This craft uses things you already have in your kitchen, yard, or neighbourhood to make beautiful ornaments for your tree.
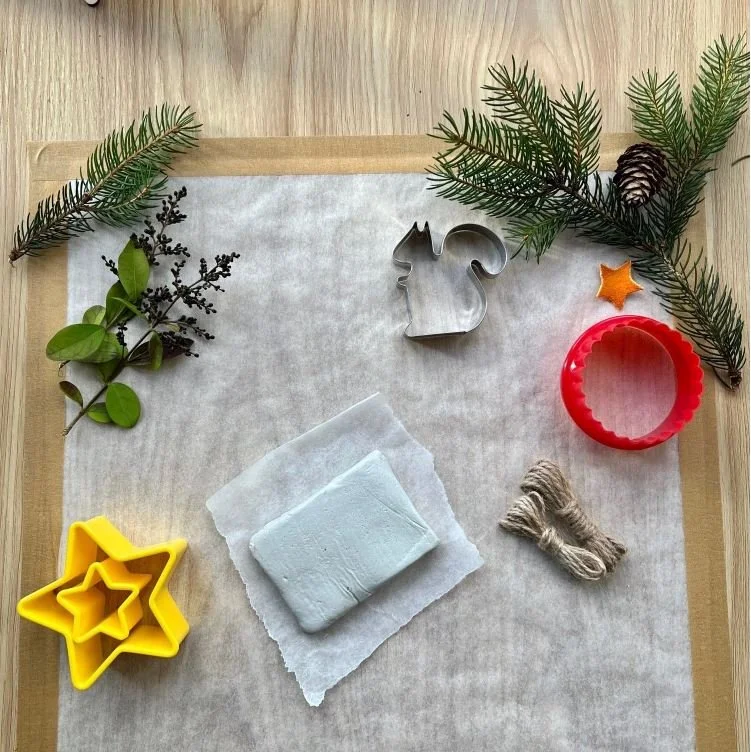
What You Need:
Air dry clay
Cookie cutters
Rolling pin
Wax or parchment paper (optional for easier cleanup)
skewer, straw, stick to make small holes
String or twine
foliage (small leaves, ferns, cedar, pine, flowers)
Next Step!
Go outside and gather cedar or pine boughs, leaves, flowers, even pinecones - anything with that would make a good stamp.
Knead the clay to make it pliable - ad a few drops of water if it starts to crack.
On flat surface covered in wax paper or parchment, roll out the clay to about ¼ inch thick.

Use your cookie cutters to cut out shapes in the clay. If the edges are a little ragged after you have removed the excess clay, you can just smooth them with your finger.
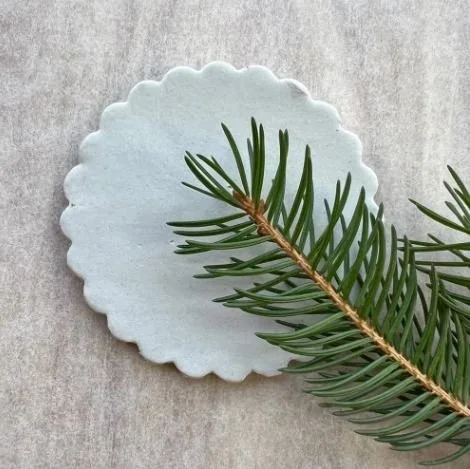

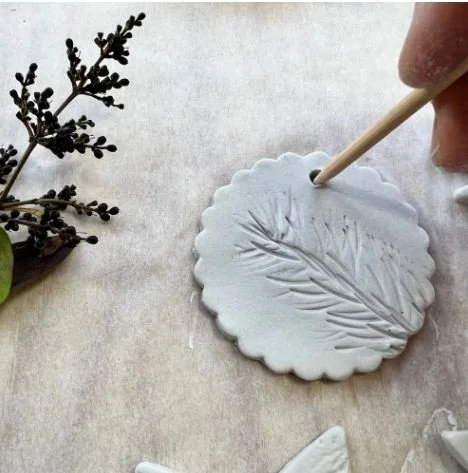
Place some foliage onto the clay and firmly press with your fingers to imprint the pattern onto the clay. You can also roll over the foliage with a rolling pin or glass bottle. Either way, you need to make sure that you don’t press too hard and distort the shape. Carefully remove the foliage to reveal your pattern.
Make a hole with a straw or skewer so you can fit a string through to hang it.
Let the clay dry at least 24 hours. Insert string or twine, and hang it up!

Download printable resource for clay ornaments
Paper Snowflakes
It doesn’t take much to make your home look like a winter wonderland. All you need are a pair of scissors and some paper. Many adults have forgotten the simple art of folding and cutting out paper snowflakes, so if you need a refresher course, this is for you! With supervision, kids can happily occupy themselves by cutting out snowflakes by the dozens. Then, adults can step in to help decorate the home. So start channeling your inner Buddy the Elf and get snipping.
How to Make a Paper Snowflake

Start with a square piece of paper. If you’re using regular printer paper, fold one corner diagonally to the opposite edge and trim off the excess strip to make a square.
Fold the square in half diagonally to create a triangle.
Fold the triangle in half again to make a smaller triangle.
Divide the triangle into thirds. Bring the right point across the front, then bring the left point across on top of it so the two flaps overlap. Adjust until the sides look even.
Trim the points. Cut across the top to create a straight edge—this will make the snowflake symmetrical.
Cut out shapes along the sides. Use small snips and curves, being careful not to cut all the way through from one side to the other. The more varied the cuts, the more intricate your snowflake will be.
Unfold gently to reveal your snowflake.
Display and enjoy! Tape them to windows, hang them from string, or scatter them as table décor.
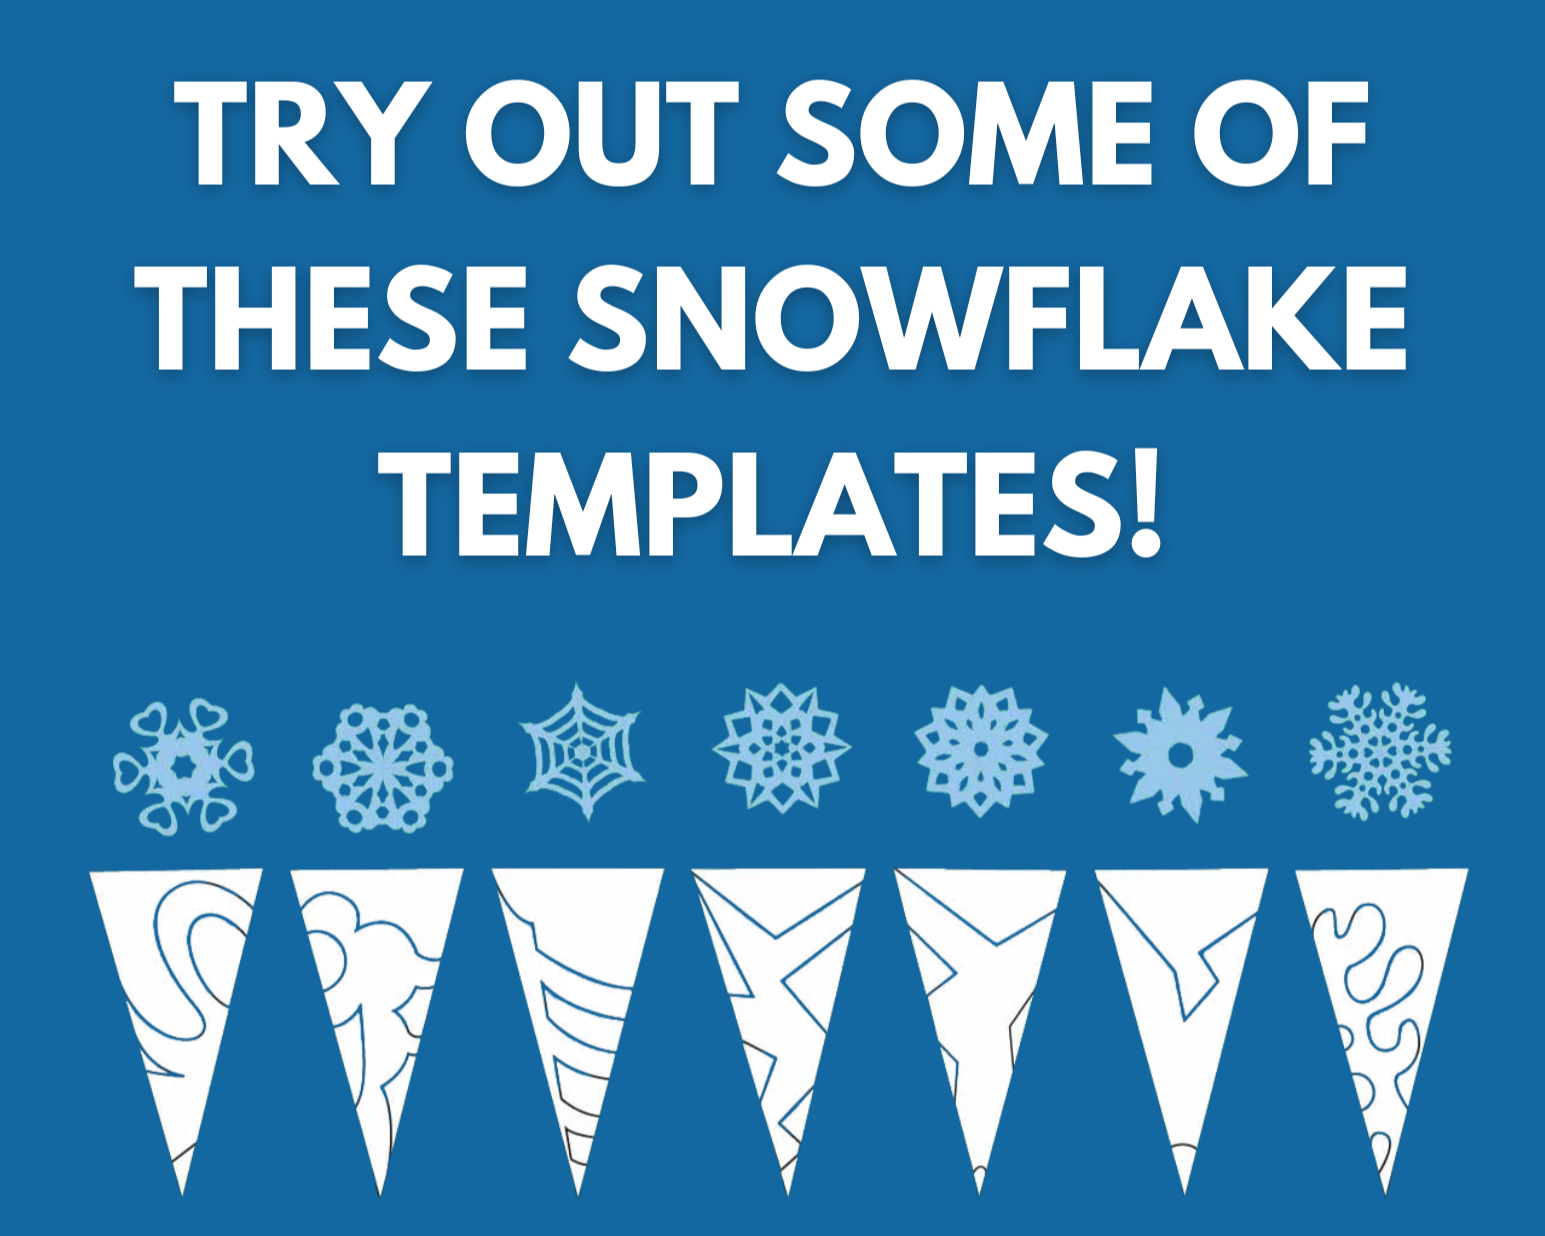
Download printable resource for paper snowflakes